Finally fashion has decided to reward all the talent you showed in your art class. And if you were not very great at painting, still there is a way you can get your very own hand-painted pedicure at home and surprise everyone. All you have to do is loose your inhibitions and get ready and excited with your paints to create your very own masterpiece, on a nail instead of the conventional canvas.
But first it is time to clean your nails to get them ready. All you have to do is dip your feet in luke warm water, which has some shampoo, a little oil and Epsom salt. Keep the feet dipped for 10 minutes, scrub using a foot scrub and then with a pumic stone. Clean your nails, trim and file them. Wash, pat dry and your nail canvas is ready along with clean feet as the backdrop.
 How To Do a Hand-Painted Nail Art Pedicure
Things you will need
- A nail color for the base (white, red or any color of choice)
- Detailing brush
- Acrylic Pants
- Small bowl of water
- Clear Top Coat
- Toe separator or cotton balls
- Rough Cotton cloth to wipe any paint strokes which go wrong, just in case.
- Glitter nail paint (Optional)
Steps to follow
- Separate toes using a store-bought toe separator or cotton balls.
- Paint your nails in the base color of your choice. Double coat the colour once one dries up well.
- After the base is dry, be ready to paint on it.
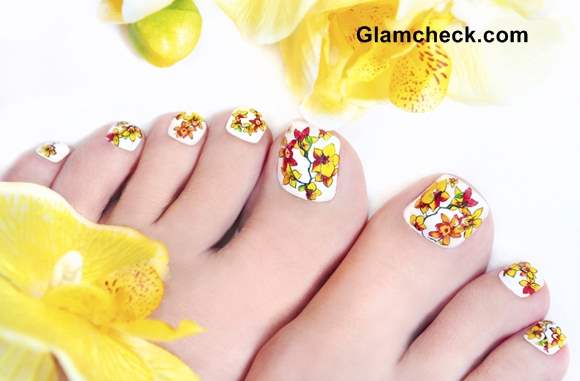
- Use the included pictures of the pedicure as a reference point and innovate and improvise if you like. You can paint the design on all the nails or simply one nail in order to highlight.
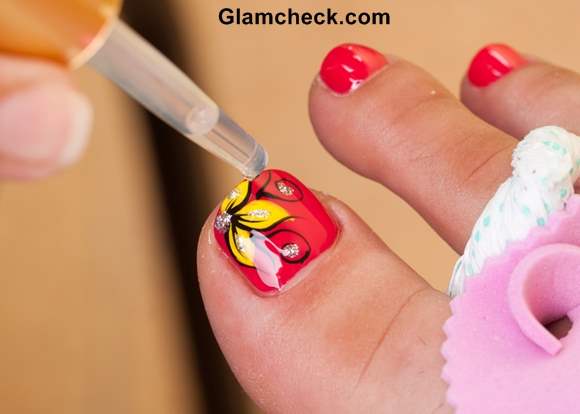
- Start with a single nail first. With your brush start painting the flower petals. We have chosen a yellow flower.
- To paint dip the brush in the water bowl. Squeeze the water out with your fingers. The slight dampness will hold the brush hair together.
- If you want a single flower, then make the petals larger and place in one corner or for many flowers make the petals proportionally smaller.
- Once the petals are created, join them with green swirly stems and add a leaf or two. Remember to wash the brush each time before changing colour.
 Feet Nail Art – Pedicure
- To give depth to the flower you can add a deeper color. Orange compliments yellow a lot and hence our choice. Paint it in the centre, fanning out from the centre in some flowers or covering a few petals in others. Asymmetry makes it appear more natural.
- Now comes the outlining. You can choose to detail your design with black or white, depending on your base color choice. For smaller flowers make the detail line thinner as compared to bigger flowers.
- If only painting one big flower you can detail and make curvilinear patterns with this black colour too, in order to make the design interesting
- To make your pedicure even more glamorous and jazzy, you can add small glitter dots.
- Repeat a similar paint on the rest of the nails. Each toenail being a different shape and size, it is impossible the paint exactly the same design which is a good thing. Just use the same colours and the shape of flowers.
- Allow the paint to dry.
- Add a clear top coat to seal in the design and make it glossy.
Tips
- In case you go wrong with a paint stroke instantly wipe with a cotton cloth. In case that doesn’t come off, use a remover and re-paint your nail.
- Wear an open-toe pair of footwear for a little while after the pedicure, to keep it secured in any case.
- The thinner brush you would use, the better the result.
- If you are still not sure of your painting, choose abstract flowers instead which have more room for little mistakes.
Shutterstock
