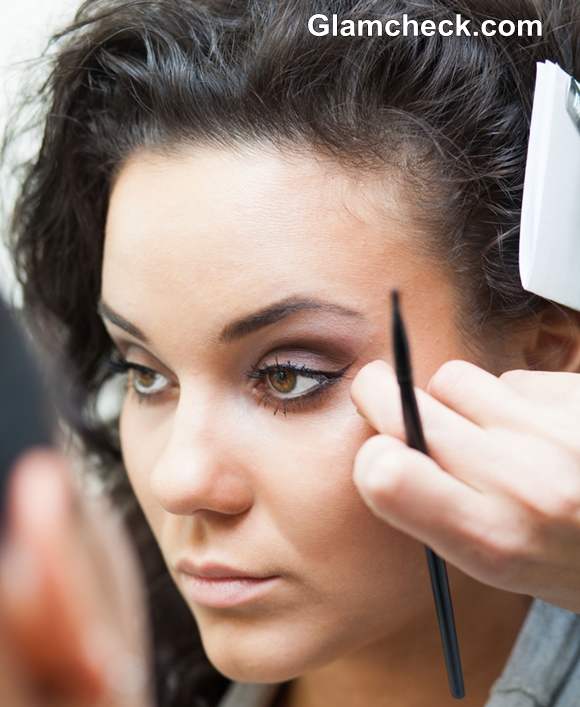
Each season brings with it, its own complications when makeup is concerned. If sweating can fail your makeup efforts in summers, dry flaky skin and dull complexion pose problems in winters. And armed with half of the information, you can only do half justice to your skin. Hence we at Glamcheck felt that a step by step guide to winter makeup can be much needed helping hand to every reader out there, after all we face this challenge of looking flawless together each day.
 How to apply makeup in winters
Preparation
You will need : Cleanser, Toner, Moisturizer, Cotton Balls.
Going straight to apply your foundation could be the worst mistake you can do in winters. Always follow these preparation steps before sitting in front of the mirror to get ready. Addition to these, following a regular exfoliation routine is necessary in winters to get rid of dead skin cells which make skin dull.
- Cleanse your skin with a mild cleanser suitable to your skin type. (oily, combination , dry) Skin type is always indicated on the packaging hence pay attention while buying.
- Using a cotton ball, apply toner in upward motion to your freshly cleansed skin.
- Moisturizing is the most important part of prepping your skin for makeup. Dry skin is never a good texture, soft and supple skin is; hence make sure to moisturize well.
Applying the Base Makeup
You will need: Primer, Foundation, Concealer, Sponge or foundation brush (Optional)
Liquid foundation wins over mineral in winters. But most women out there use the wrong color of foundation which spoils their whole look for them without a slightest hint to the user. Always test the color on your cheeks and choose the one that almost disappears in your skin tone. You could feel an inclination towards a shade lighter, but it would be not right for the skin. Once you have the right foundation, half the battle is won.
- Prime the skin of the face and neck with a primer. It fills in pores and makes the makeup last longer.
- . Apply little dots of the foundation on your forehead, nose, both sides of the nose, cheeks, chin and neck. Merge it evenly with your fingers. You could use a sponge or foundation brush too, but merging is always better with fingers.
- Apply concealer with a small brush to even out any discolorations that still remain. Blend in well.
Note: Some women like to apply the concelaer before foundation. Do give both the ways a shot and choose what works best on you, since it may vary from skin to skin.
Contouring
You will need: Powder bronzer, Round Fluffy Brush, Translucent powder / highlighter powder.
Since, the skin on your face is never even in color, contouring is often an essential part of makeup. Or else face can appear flat and a clear distinction between the hairline and foundation is visible.
- With a round fluffy brush, dust the bronzer, a color darker than your foundation.
- The areas to use it upon will be hairline, temples while blending towards the cheek and the jawline.
- If you have a T zone that becomes shiny, apply translucent powder on it with the same brush. If your skin is very pale use a highlighter powder instead on the temples, bridge of your nose and cheekbones.
Apply Blush
You will need: Powder blusher, Blush Brush
Blush can add a glow and life to your skin no matter the age and skin type. If done right, this will be a winning step in your make-up regimen. While choosing the right color for you always go for the muted ones that look natural on you. Think of the color of your cheeks when you are naturally flushed. Never go very dark or towards brown. Pinkish- browns, peachy hues and those with gold undertones work well with most women.
- Apply the blush on the brush and place it on your cheek bone right at its centre.
- Apply using circular motions and while concentrating on the apple of the cheek.
- To blend in with the temples, move away slowly in circular motions only.
Eyes
You will need: Eye lash Curler, Mascara, Eye Shadow, Eye liner, Eye Shadow Brush, Primer, Eye Pencil
The steps below will depend on the occasion you are dressing up for. Whether you want a natural look or an evening look would define choice of colors of eye shadows and whether you need to apply it all. For more information on what colors are hot this season read the Winter Color Guide.
- If applying eye shadow, always use a primer first, for a richer color and lasting stay. Primers usually come with their own application brushes that work well.
- Use eye shadow brushes for applying the color and smudge brush for a smokey look.
- Highlighting the brow bone with a lighter hue always makes your eyes look bigger and fully opened. Dark color on the brow bone will have the opposite effect.
- Apply eye liner over the upper eye lid with steady hands. The winged eye look is all the rage in winters.
- Apply the liner in small strokes, i.e in a continuous motion but small strokes can draw up the whole line.
- If unsure about the thickness of the line, start with a evenly thin one gliding along the lash line as it can always be thickened.
- If not applying eye shadow, for the day, use eye liner on the lower lash line too and let it dry.
- Next hold your lashes between a curler, press and hold for a few seconds.
- Make sure both the lashes are equally curled.
- Apply mascara in upwards strokes on the insides of your lashes. Comb off any access after drying.
- Pluck your eye brows in shape and use an eye pencil to define further.
Lips
You will need: Lip Primer, Lip Liner, Lip Balm, Vitamin E enriched lipstick, Lipstick Brush.
In modern times, as a thumb rule (with a very few exceptions) either you focus on the eyes or the lips. Both of them together in bold colors hardly work in real life. So chose colors wisely and read Glamcheck’s winter color guide.
- Everybody’s lips chap in winters and hence the lip balm is your best friend.
- Dab a little before each application, and if not applying lipstick then keep applying a colored lip balm with SPF regularly during the day.
- Apply a lip primer afterwards, which even the texture of the lips further more.
Tip: If your lips are dark and hence the colors of lipsticks change after application to lips, use your foundation or concealer instead of the primer.
- If you have a lip liner that matches you lip color, use that first to define the boundary. This step makes lipstick lasts longer.
- If not, skip the above step and use a lipstick brush to fill in on your lips. It is always more precise to use the brush.
- Fill in from center outwards.
And with that detailed step by step guide, it is hard to go wrong with your makeup this winter. Hence ladies, go ahead – look flawless and shine away beating the winter woes with beauty!
Also Read:
As the season changes your make-up palette and preferences also need an update. For the complacent ones, the summer’s […]
The Essential guide to Beauty in Winters 
Some say winters are their favorite season. It is really hard for some to maintain beauty during these cold months. […]
Shutterstock

