Nail art has no bounds. It’s the diversity that intrigues us. From young teenagers to glamorous divas, it can be worn by one and all in ways that are best left to each person’s imagination.
Not only can it add flair to your everyday look, but it’s also great for a night out. And with a range of products at your disposal, you can actually pick and choose what you want to wear and how you’d like to wear it. The magic is all on the nails!
So here’s one such look for you, to make your nails sparkle the nail art way.
Things You Will Need
Before you start, make sure to get your things ready and within reach. On a table, place a sheet of paper or a towel, a bowl filled with water and the items listed below.
- Nail Polish Remover
- Cotton Pads or Balls
- Pale Pink or Nude Colored Base Nail Polish
- Nail Gel
- Nail Art or Makeup Brushes
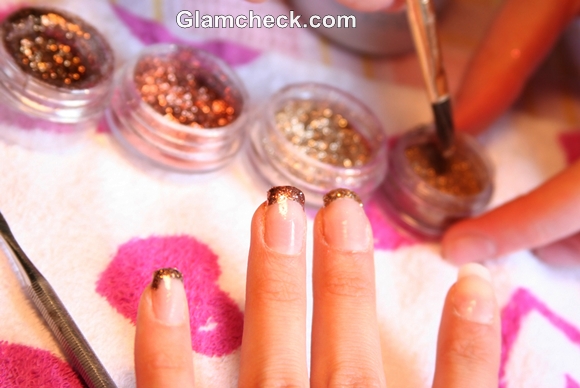
- Nail Art Shimmer in Different Colors
- Nail Art Add-ons Like Rhinestones or Stickers
- Tweezers
- Q-Tips or Wooden Manicure Sticks
- Clear Nail Gloss
And lastly you’ll need patience and practice. So don’t give up if it doesn’t turn out right in the beginning.
The D- I- Y Process
 DIY Nail Art Shimmer and Gloss
- The first step is to have clean nails that are trimmed and symmetrically shaped.
- Before you proceed, make sure that your cuticles have no previous nail paint on them.
- To begin, apply a pale pink or nude base coat. Make sure your “canvas” is completely even and dry before you proceed.
- There are many ways to mix your glitter before applying it on your nails.
Option 1
Mix your glitter and nail gel together until it reaches a consistency that can be used to paint your nails with. Now brush the mixture onto your nails in the shapes or patterns that you want.
Option 2
Apply nail gel directly onto the nail in the areas where you want to apply your glitter. Using a brush, lightly dust the nail with glitter and then shake your nails to remove excess glitter and allow them to dry.
Option 3
After applying your base coat, paint your nails with nail polish over desired areas and dust with glitter while it’s still slightly wet. This technique isn’t as long lasting as when using nail gels.
 DIY Nail Art Shimmer nail tips
- Remove excess glitter and nail polish using Q-tips or manicure sticks.
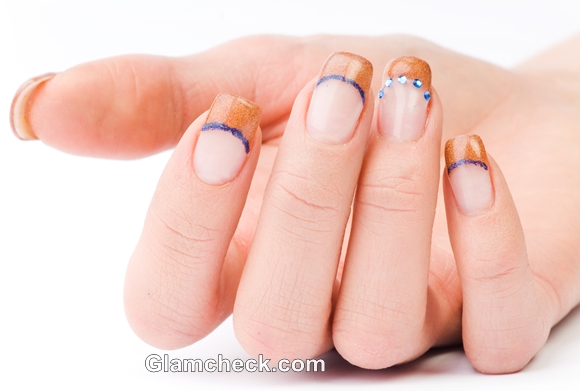
- If you want to make dots around the edges of the shimmer or anywhere else on your nails, you could do so with a toothpick or a fine brush. But be very careful.
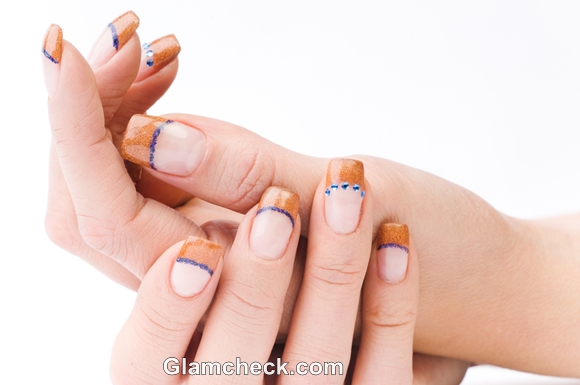
- You could add rhinestones or stickers with the aid of tweezers. Add a drop of nail gel on the base of the rhinestone before applying and press down firmly.
 DIY Nail Art golden Shimmer on nail tips
- And lastly, good top coat is essential to preserve your nail art. After applying shimmer and letting your nails dry, you could use clear nail gloss or nail strip layer to cover your nails.
Removing Glitter
Removing glitter from nails can turn some people away from ever using it. There is a really simple way to do it, so don’t be afraid of using glitter in your nail art. All you have to do is soak a cotton pad in acetone and then place it over your entire nail. Cut strips of foil and wrap your nails and the cotton pads in it. The foils prevent the acetone from evaporating and after 5 minutes, apply pressure on your nails and drag the foil and cotton pads off. Repeat the process, if required.
Tips
- While applying shimmer, start a little lower than the natural smile line of your nails. And remember, simple concepts are sometimes the most attractive.
- Art grade acrylic paint is a good idea while using multiple colors as the nail varnish of various colors makes it harder to apply with a brush.
- You could practice new techniques on false nail tips until you are confident enough to do it on your own nails.
- False nail tips are also great if your nails are not long enough for nail art.
- You could also use some loose mineral pigment or old eye shadow while trying the third method.
- To steady your hand, try resting your arm on a firm surface like a table.
Now you’re all set to get out there and work some nail magic!
Shutterstock
