Holi is right around the corner and for this occasion we bring you a simple yet eye catching nail art idea. Our easy to do holi nail art features a riot of colors splashed and splattered on your nails ‐ celebrating the true spirit of this festival of colors.
Things you will Need
To get started, all you need are clear nail varnish, nail polishes in colors like orange, green, pink and blue, thin paintbrushes, Q-Tip, and remover.
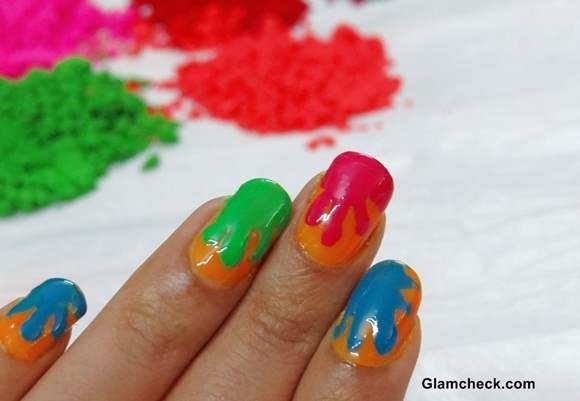 Holi Nail Art DIY – Splash of Colors
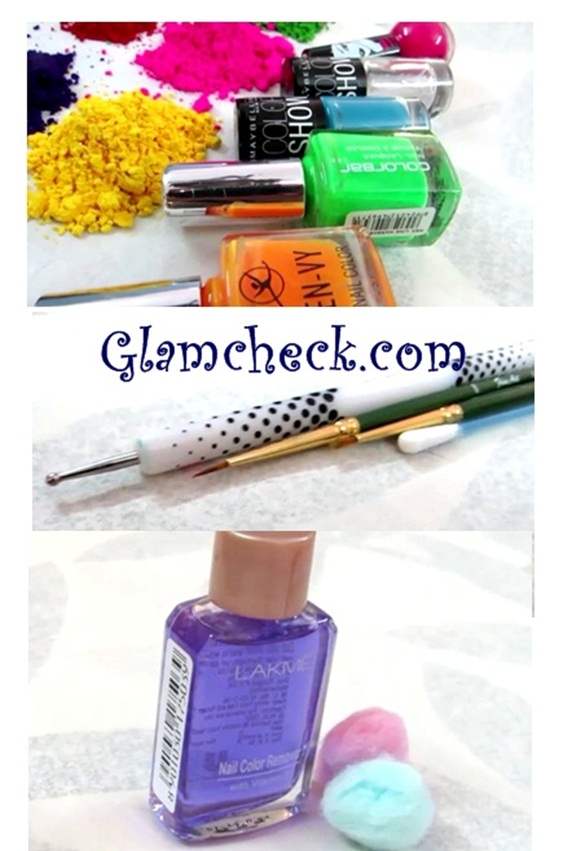 Holi Nail Art DIY
DIY Steps
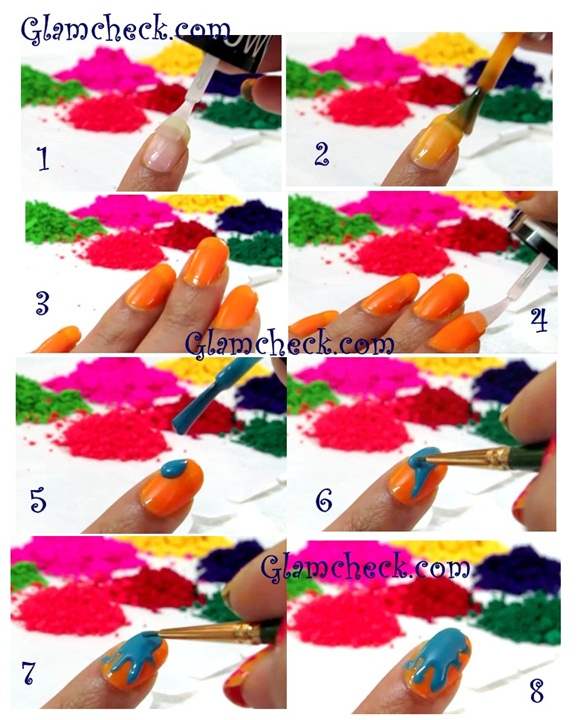 Splatter Nail Art for Holi
- Start by coating the nails with clear varnish to prepare it for the nail art.
- Next, paint all the nails with the orange polish ‐ this shall be the base.
- Once it dries, Apply 1 more coat of clear varnish to all your nails and allow it to dry completely before you begin creating the design.
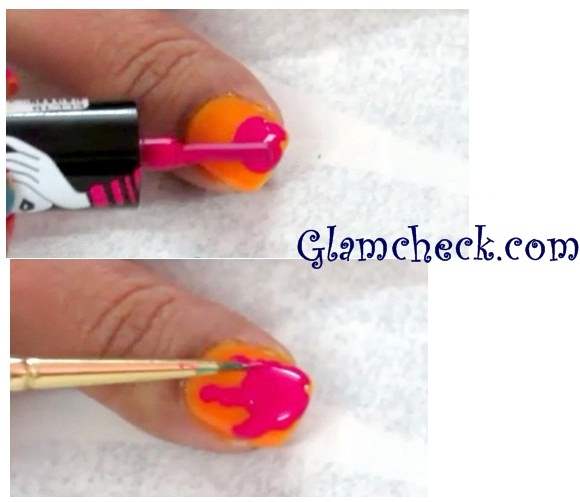 Holi Nail Art
- To create the splash, Apply a dot of nail paint in color of your choice on the top of the nail and then use the paint brush to spread it unevenly in the shape of a splash. Don’t worry about perfection.
- Repeat this step with the different colors for all the fingers as shown here. Don’t worry about the nail paint spilling on the sides of the nails. We will deal with it later once we are done creating the design.
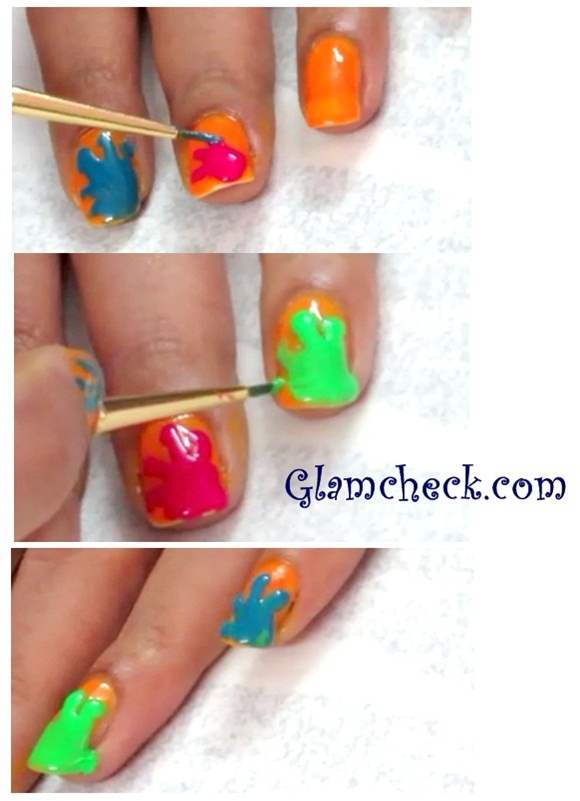 Holi Nail Art DIY – Splashes and Splatters
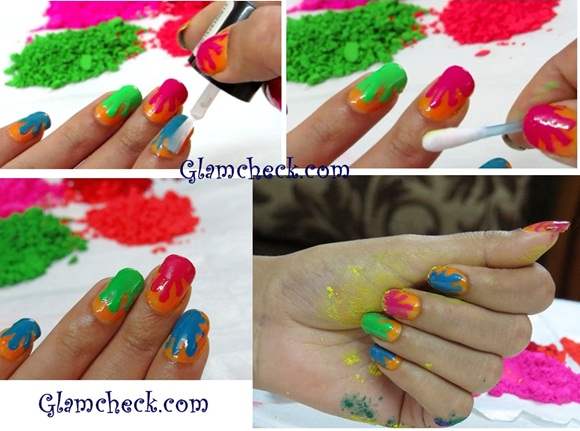 Splashes and Splatters Holi Nail Art DIY
- After you are done with making the “splashes and splatters”, put a coat of clear varnish again on all the nails to hold in the color and nail art and allow it to dry.
- Remove any nail polish spillage on the sides of your nails with the help of a remover dipped Q-Tip.
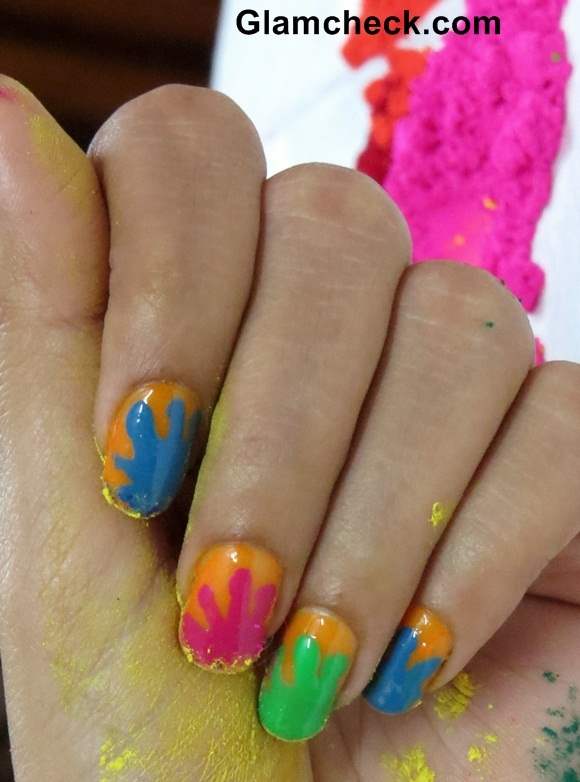 Splatter Nail Art DIY
And you are done! Remember, you can also play with the choice of colors and opt for a base coat in a different hue. The trick is to select only bright colors, especially those that imitate the colors of gulal. It is really easy, simple and non time consuming to make this nail art. So go ahead and sport it this coming holi, or in fact whenever you want some extra color in your life!
